
To get started mining your L3+ Litecoin, or other Scrypt coins, watch this video! You can also use it to get paid with BTC, LTC, or just about any other altcoin!
The Risks of ASIC Mining
Some developers don’t like the idea of ASIC (Application Specific Integrated Circuit) manufacturers having a say in their coin development. However, other ASIC developers (such as Bitcoin, Dash, and Sia) are allowing ASIC miners to mine their coins.
For example, Monero developed the Bitmain X3 for ASIC mining. (And many speculate that Bitmain successfully mined Monero with ASICs for many months.) But the Monero development team eventually forked the coin, so that the ASICs would no longer be compatible with it.
Here’s what developers fear: These powerful ASICs could lead to large, centralized mining farms, and could potentially even launch a 51% attack. (This kind of attack occurs when a person or entity controls 51% of the hash power of the network.) There is some risk involved in buying an ASIC miner to mine a coin, because it can potentially become useless.
However, many ASICs can be quite profitable in the long run. For example, in Monero’s case, the X3’s were used to mine other CryptoNight coins that haven’t forked yet, and are actually quite profitable.
My Opinion of the Antminer L3 ASIC Miner
The Antmier L3+ mines the Scrypt algorithm, and the primary coin it uses is Litecoin. The L3+ debuted last summer, and it was very profitable for a long time. In fact, it made around $20-$30 per day, even with rising difficulties and network hashrates.
This winning streak was primarily due to the epic price run that Litecoin made in 2017: It went all the way from under $3 at the beginning of the year to over $300 at the height of the crypto market in December.
I desperately tried to get one, but Bitmain was always sold out. I finally bought one on Amazon, and I actually ended up getting scammed. However, Amazon came through for me, and I received a refund.
Here’s the moral of that story: If possible, buy directly from the Original Equipment Manufacturer (OEM).
I did eventually get my hands on some L3’s, but they’re nowhere near as profitable now.
The market has significantly been down since then, and difficulty is still climbing, as more L3’s are sold. So at the time of this writing, profits are back down to around $3 per day. That said, they’re also much cheaper now. They usually go for less than $600, and you should be able to reduce that price even further by using coupon codes that you can find around the web.
The L3++ is also now available, which is a little faster and a little more expensive than the L3+. (This article is a setup guide that will apply to both models.) Of course, here’s the upside with cheap ASIC miners: If and when crypto prices do take off again, the profitability of miners will go through the roof. So within a single bull-market cycle, you’ll quickly get an ROI many times over.
Setting Up the Miner
Let’s walk through setting the miners up. Then I’ll give you some thoughts about how to optimize their usage to maximize your profits…
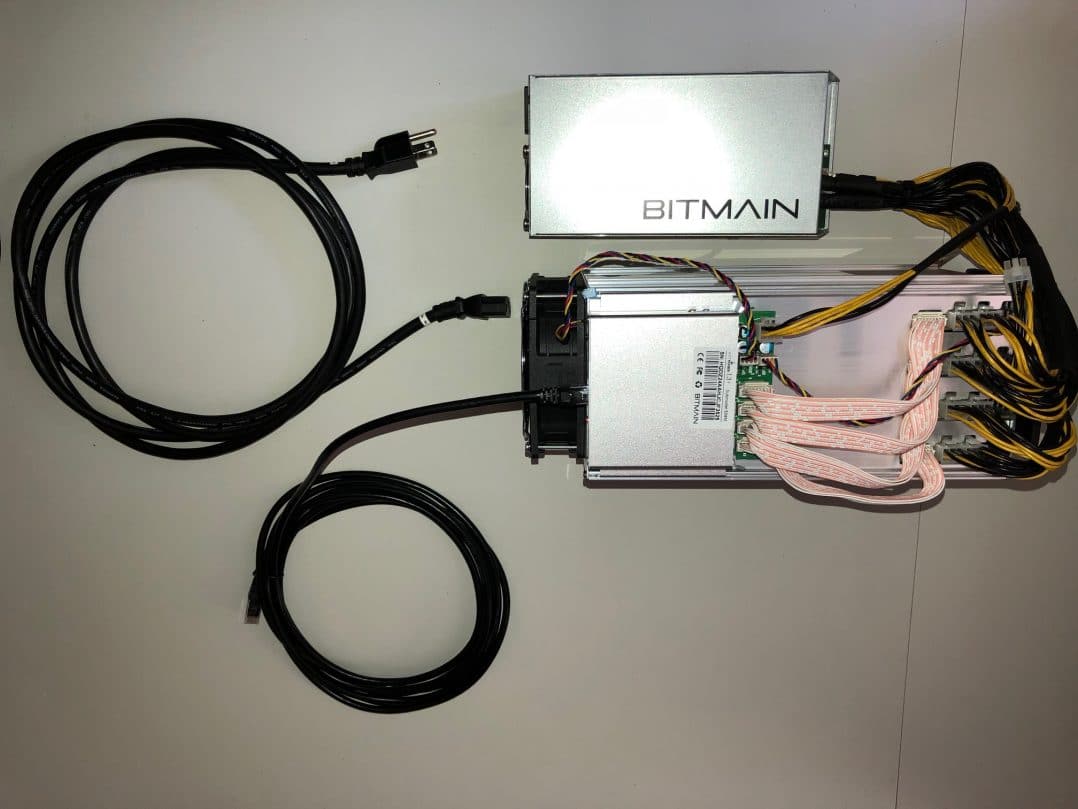
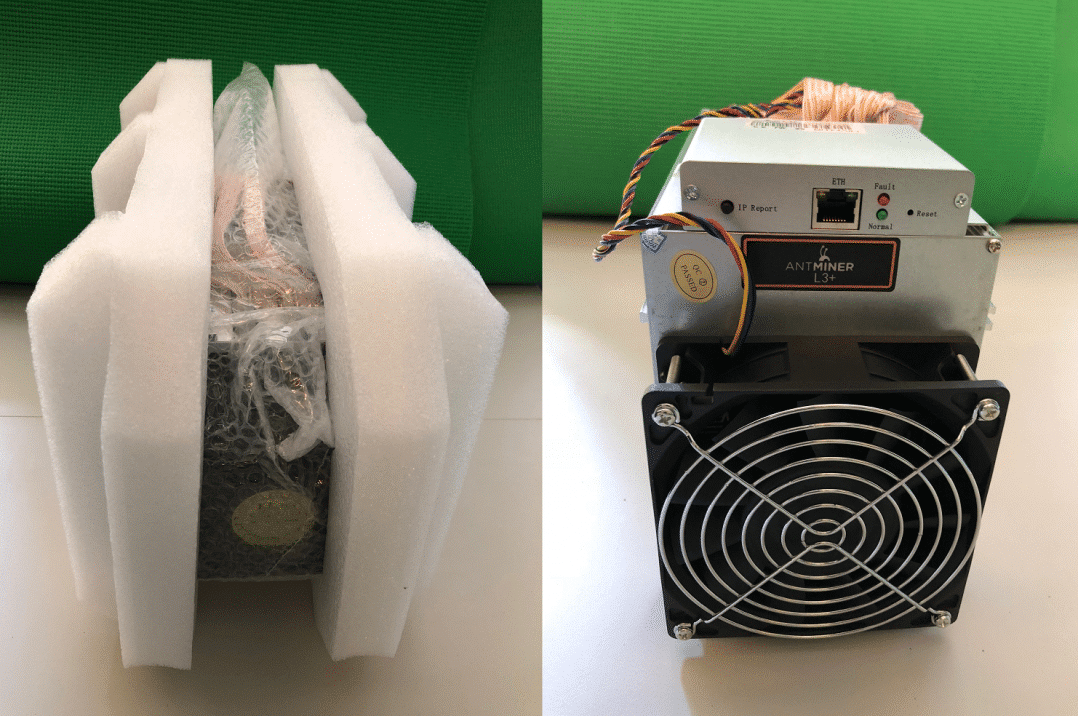
Unbox your miner, power supply, and cables.
Hook everything up:
- All 9 PCI-e connections (2 on each of the 4 hashing boards, and 1 on the controller)
- The Ethernet cable (from the L3+ to your router)
- The power cord
Then the miner should power on automatically.
After you power it on:
- Download the free IP Scanner tool (the Angry IP Scanner).
- Install and run the Angry IP Scanner.
- Click “Start.”
- After the scan completes, click the “Go to” dropdown at the top, and choose “Next alive host.” Eventually, you’ll see an Antminer appear.
(Note: It may not specifically show as an Antminer. If you have a lot on your network scan and cannot easily distinguish your networks, you may need to try multiple devices.)
- Once you find it, right-click on it. Choose “Copy IP.” Then paste it into your browser.
Here’s how the whole process should look:
Choosing Your Litecoin Mining Pool
This choice will vary, based on the mine you have and the way you want to be paid out. For example, you can mine on a Litecoin pool, and directly get paid in Litecoins. Or you can mine on Nicehash, and get paid in BTC. Even better, mine on ProHashing.com, and get paid in the coin of your choice!
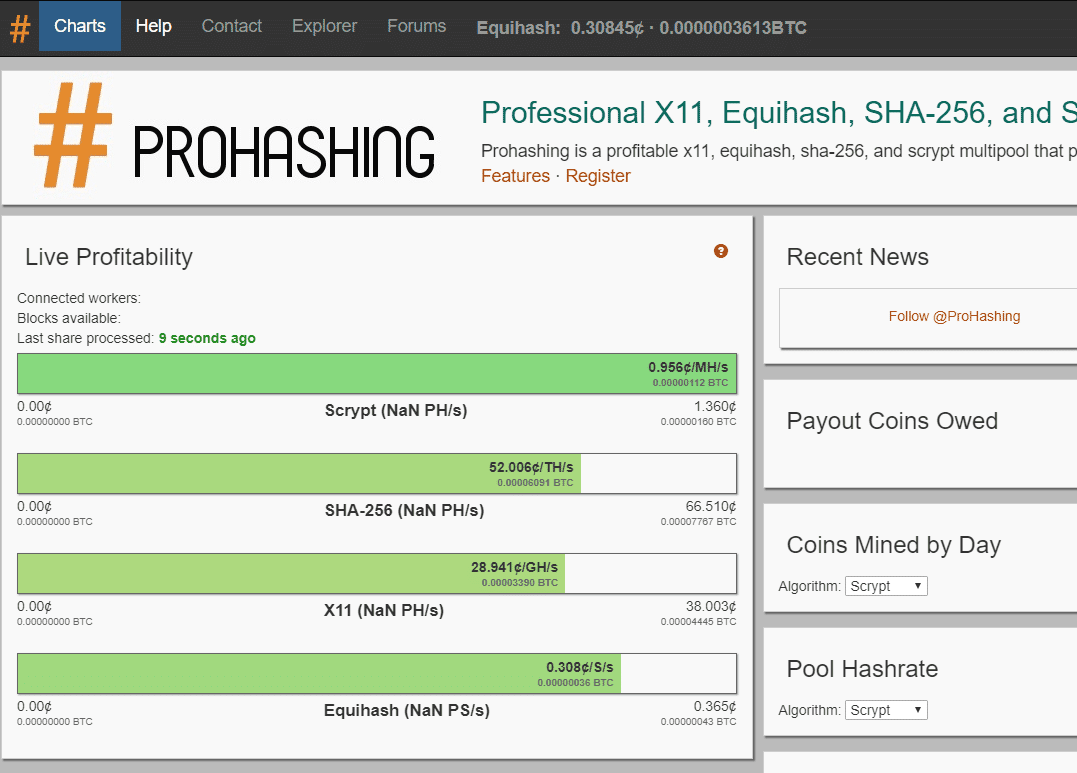
Here’s what I like about the power and flexibility of ProHashing: They automatically mine the most profitable coins for each supported algorithm (such as Scrypt, SHA-256, X11, and Equihash). They then pay you out in the coin you choose.
Even if you only want to use Litecoin with your L3+, you can mine the most profitable Scrypt coins. Then you’ll get paid out in Litecoin, so you’ll likely make more Litecoins than you would have by just mining Litecoin on another pool. By using ProHashing, you don’t have to make calculations or hunt for profitable pools. Instead, you just mine on ProHashing, and their software takes care of the rest.
For extra profitability, you can select payment in coins that you think have a higher likelihood of increasing in value. Yes, Litecoin did skyrocket in value last year, but at this point, you have to ask yourself: Which coin(s) are likely to go up 5x, 10x, or even 100x?
With Bitcoin and Litecoin having such large market caps, it takes a very large amount of capital to even dream of making 5x the value. Meanwhile, you can easily triple your earnings if you get paid $3 a day—in profits, or in the form of other altcoins, which have much smaller market caps.
These odds are especially true during “alt season.” In this season, just about every altcoin gets its 15 minutes of fame (with at least one huge price pump). If you’re just looking to take profit in Bitcoin or USD, you can get paid in one of these coins, then stack your sell orders. Then when these pumps occur, your orders are filled immediately.
But with Prohashing, you don’t have to put all your eggs in one basket. You can get paid via any number of coins, with any weight you assign. So you can utilize the strategy across multiple coins, or mix in some long-term coins if you prefer.
Note: Make sure you have a wallet address ready for each coin you want to get paid in. You can accomplish this goal by going to Prohashing, and clicking on “Settings” then “Payout Proportions.”
One final word on pool strategies before we get into the details of the Antminer setup: Use multiple pool services, so you have an unrelated failover setup. Then the likelihood of both pools being down at the same time (and your machine being idle and losing money) will be much smaller.
Mining Pool Setup
Go to your Antminer “Miner Configuration” page, and enter the following:
URL: prohashing.com:3333
WORKER: <enter your ProHashing Account Username here>
PASSWORD: n=<WorkerName>, a=<Algorithm to mine>
Note: Make sure that you remove the brackets.
Actual Example:
URL: prohashing.com:3333
WORKER: Techman34
PASSWORD: n=myL3, a=scrypt
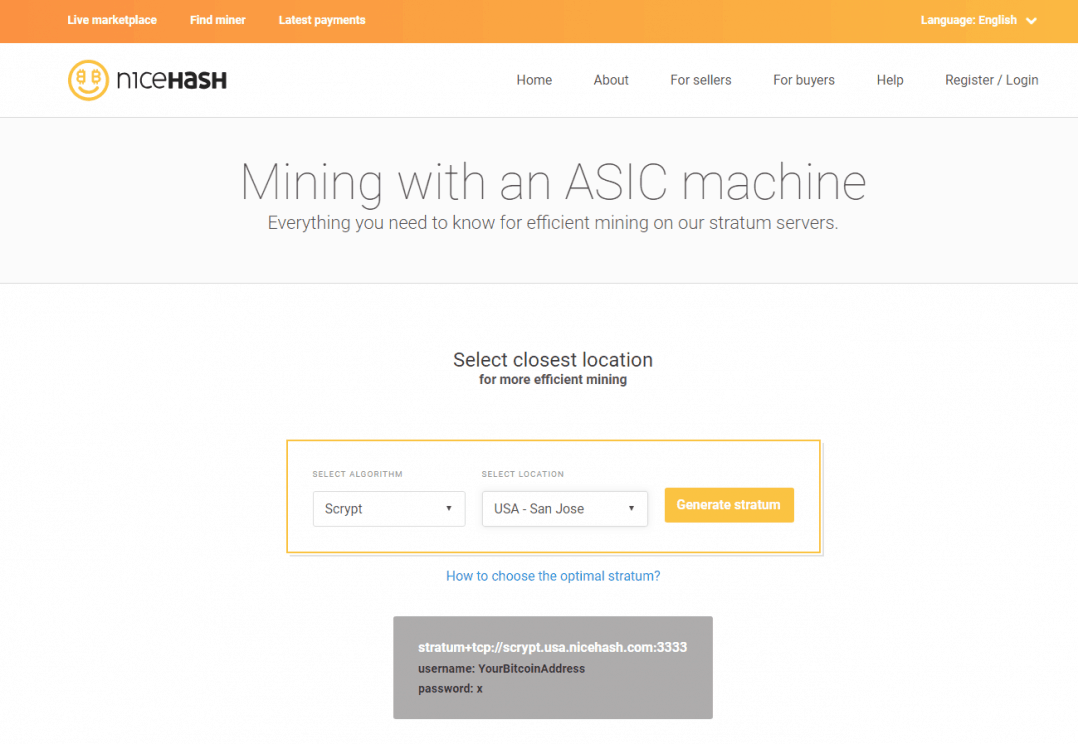
For your second pool, we’re going to mine on NiceHash and get paid in Bitcoin.
- Go to this URL.
- In the “SELECT ALGORITHM” dropdown, choose “Scrypt.”
- Under “SELECT LOCATION,” choose your region.
- Click the “Generate Stratum” button.
- Copy the URL, and paste it in your 2nd Pool, under your Antminer Miner Configuration tab.
Actual Example:
URL: stratum+tcp://scrypt.usa.nicehash.com:3333
WORKER: 37UPzLMoFE7i41qChPPXh7RxPprXWyMZBy.myL3
PASSWORD: x
Note: Under WORKER, you can use any bitcoin address you control and any worker name. Just put a period between them. Possible servers are .usa, .eu, and .jp. Then in the stratum address, just use the one closest to your location.
For the third and final Pool URL, we’ll use a Nicehash EU server:
URL: stratum+tcp://scrypt.eu.nicehash.com:3333
WORKER: 37UPzLMoFE7i41qChPPXh7RxPprXWyMZBy.myL3
PASSWORD: x
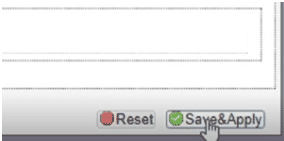
Then hit “Save & Apply” in the bottom-right corner of your Miner Configuration tab, and you’re off and mining with your L3+!
If you run into issues, watch the video above. As needed, you can pause it along the way, and work out the various steps. The process I laid out above might seem to involve a lot of steps, but it really only takes about 10 minutes to get completely set up and mining.
That’s it for the beginner’s guide to mining with your L3 ASIC Miner from Bitmain! I hope you’ve found this guide to be useful.
If you run into any issues or have questions, please comment in the field below or in the video comments. Or contact me on Twitter at @cryptocg. However you reach out, I’ll try to help.
If you’re interested in taking your crypto mining to the next level, sign up at Crypto Mining Academy. There, I offer a comprehensive course, which provides massive detail about every step of the mining process.
Happy Mining!
Ian (a.k.a. Techman34 on the Ethereum forums)
Download a handy PDF Version of this L3 Mining Guide here.

